Showing posts with label application. Show all posts

Monday, 27 October 2014

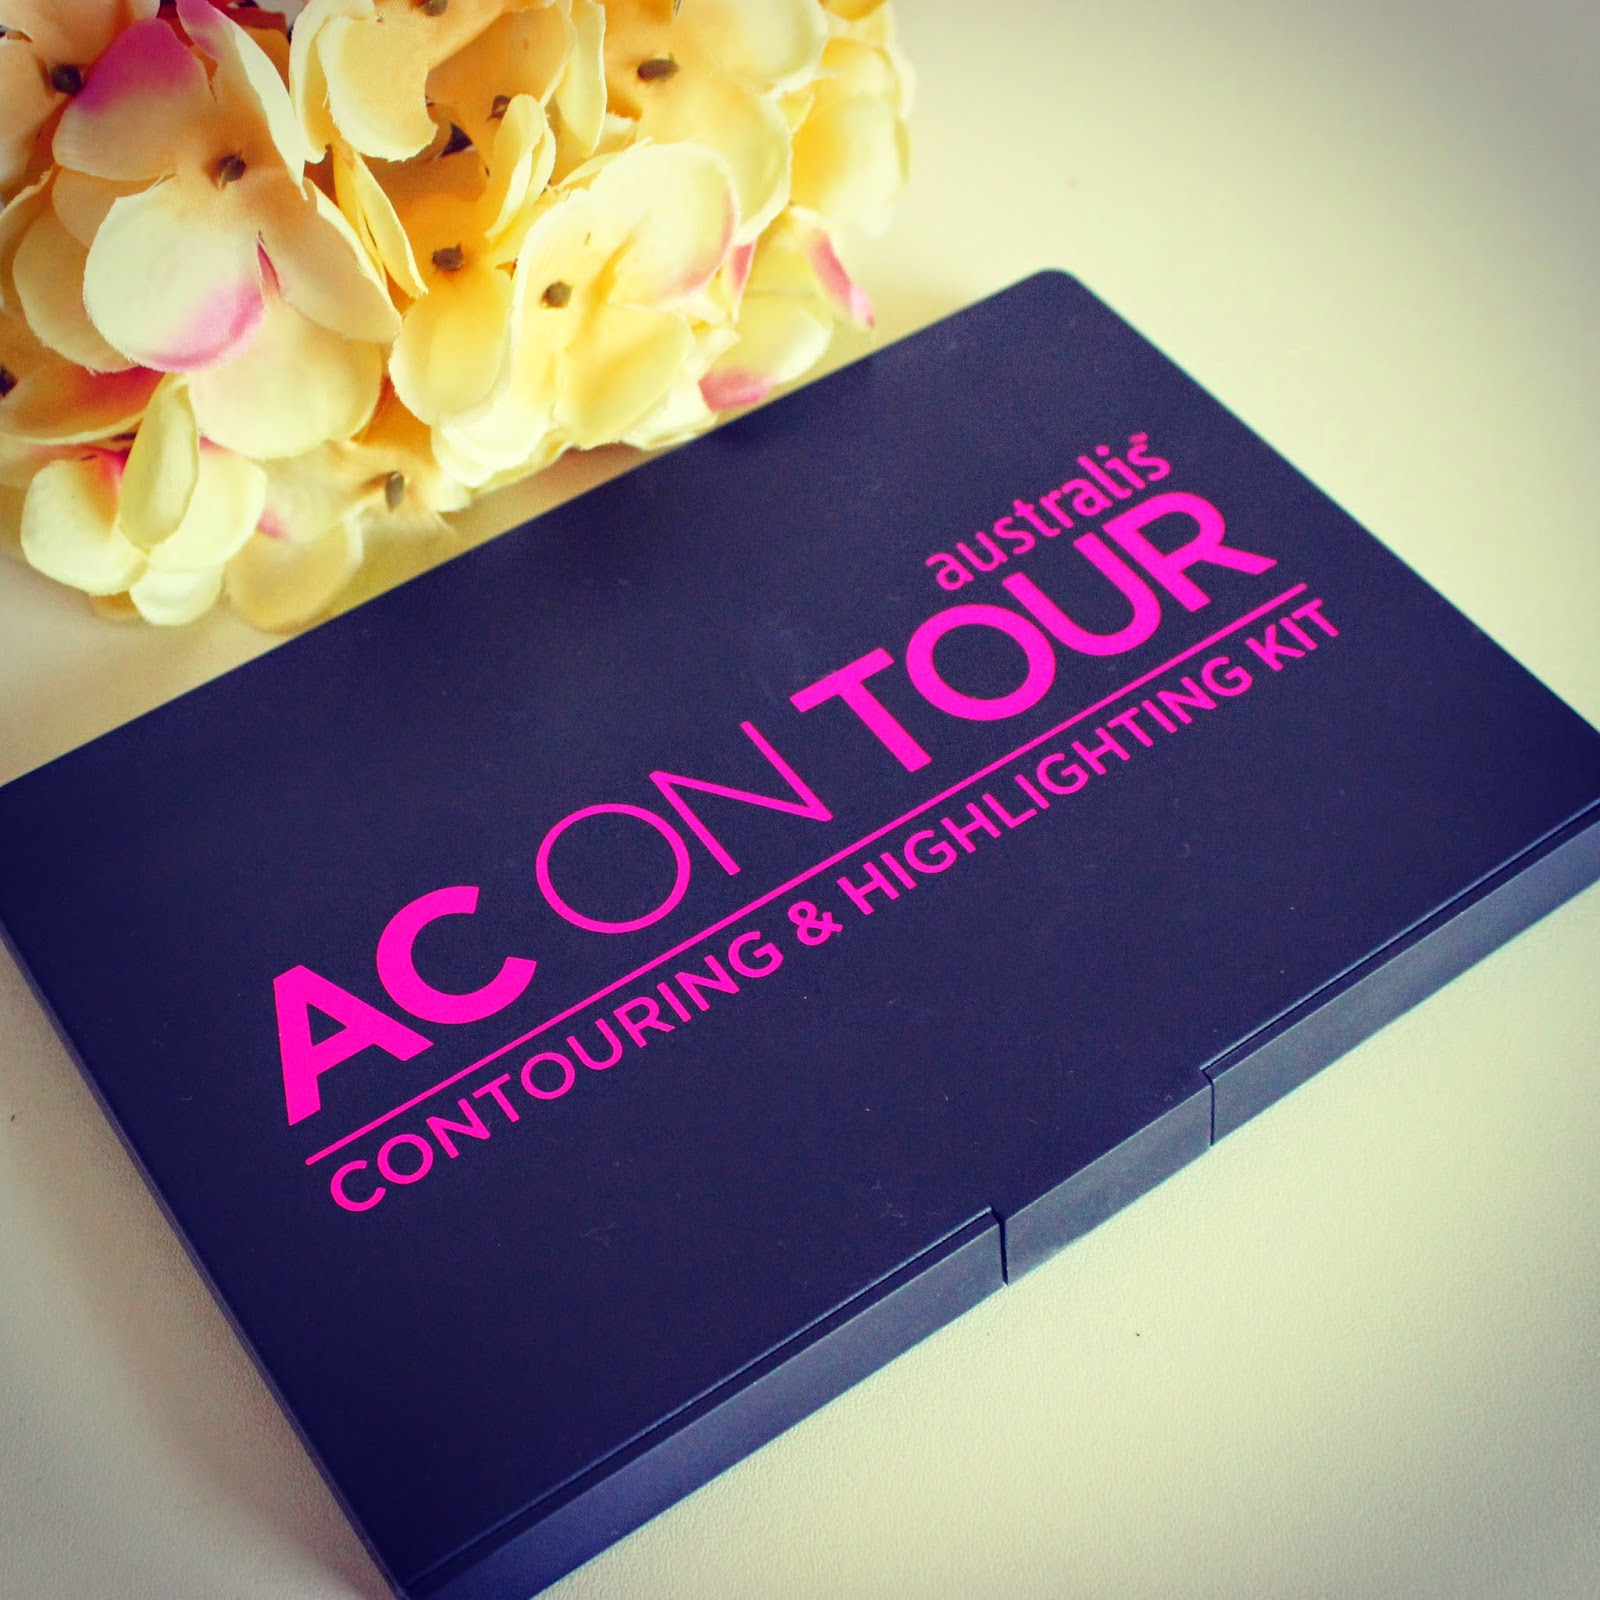
Australis AC On Tour Contouring Kit Review and Swatches

This palette has been the most talked about "MUST HAVE" product in the Australian makeup world for the last week and I think for the next few.
It has been compared to the Anastasia Beverly Hills contour palette. A lot of the beauty pages I follow on Instagram were raving about it and so of course I was eager to try it.


Contour palettes are always popular. Who remembers the demand of the Face of Australia glamazon palette last year.
And I am sure this one will be just as big.

Finding a decent contour palette is always a problem for me. I can be a bit fussy. I like matte bronzers and they are hard to find. So many nice bronzers have a shimmer to them.
Also some of the highlighting colours aren't right either.

So this palette is very versatile and there will be colours for everyone


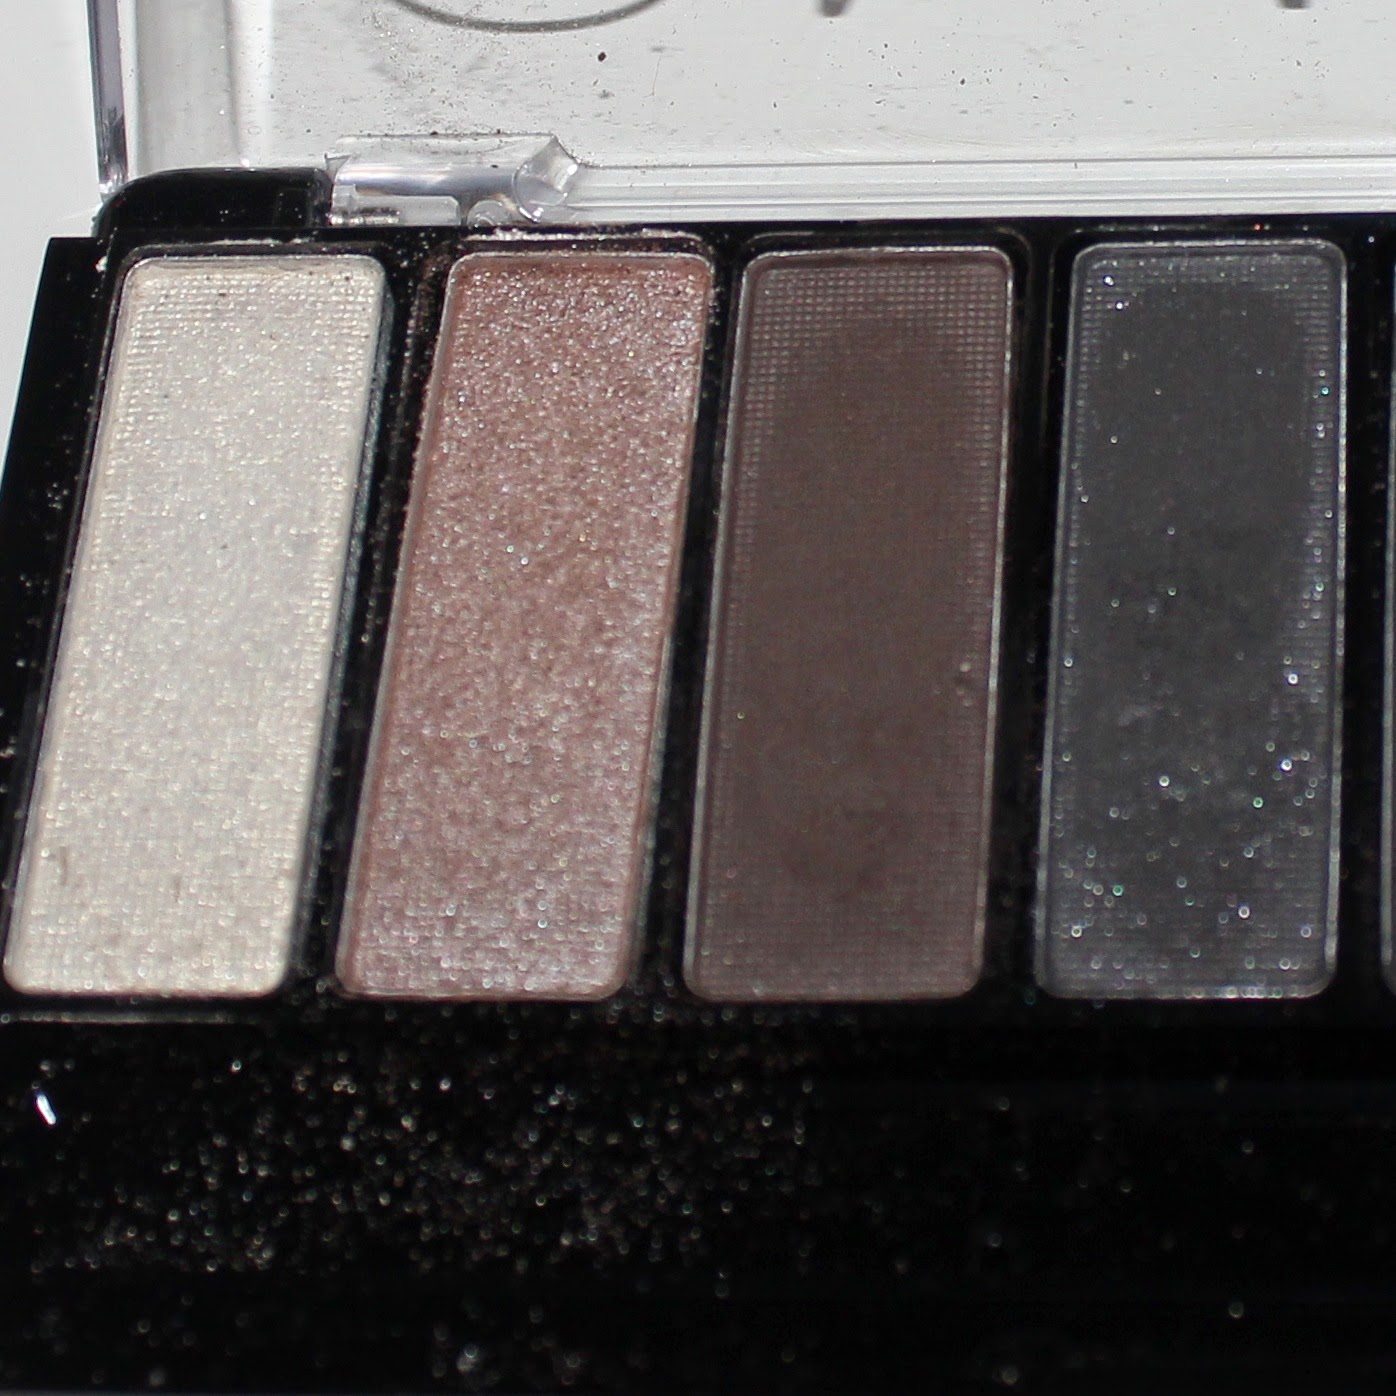
The first 3 colours along the top are the lighter colours for highlighting 2 are matte and 1 is shimmery
and the 3 on the bottom are for contouring


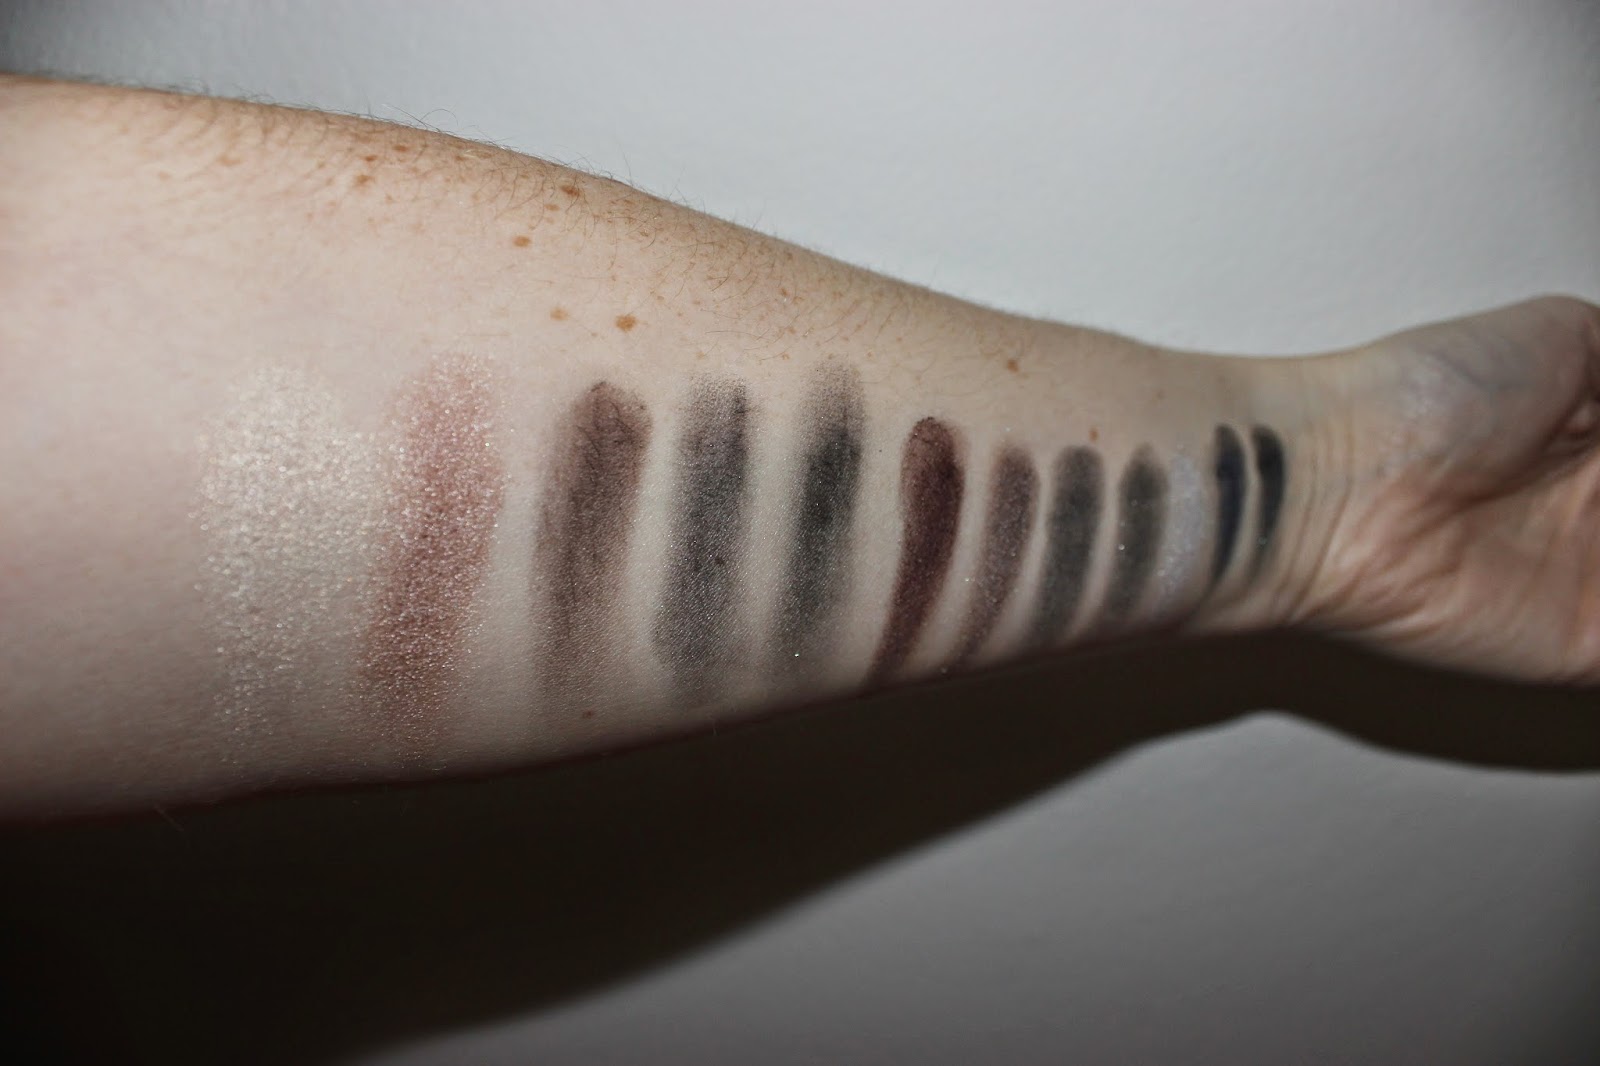
One swipe on my finger and I was impressed with how pigmented each colour was 
shade 1 is a light pink tone highlighter
shade 2 is a yellow tone highlighter
and 3 is a beige kind of shimmer colour
Shade 4 is a red undertone brow 
shade 5 is more of a flat ash brown
and shade 6 is a deeper brown


I have worn it a few times now over the last week. Still playing around with the palette. Top photo is normal foundation and in the bottom picture I had fake tanned.


The palette is available on the Australis Cosmetics website or at Priceline and retails for $16.95

If you like my blogs and want to see more follow me on Instagram: @claudaciousmakeup
and don't forgot to follow me on blog lovin

Until Next Time
xoxo
Claudia


Sunday, 28 September 2014

Review and colour swatches Revlon Moisture Stain Lipsticks

I always get excited about new products especially when Revlon bring out new lipsticks. I'm a huge fan of their colorburst crayons and now they have bought out their new moisture stains.


Liquid lipsticks are very popular at the moment so many brands are doing them but I think Revlon are always the front runners when it comes to "drugstore" long lasting lipsticks. The Colorstay range has such a good reputation that everyone knows Colourstay lasts.

When I first saw these on social media earlier this year I instantly loved the packaging the black bold outlining around the case makes it stand out and sets them apart and they also lay flat (not that exciting, but makes it easy to photograph)


I think there is something to please everyone. Reds, Pinks, Corals, Nudes and even a brown and plum. They are so pigmented that even one coat on my lips gave a decent colour but once 2 coats are applied I get amazing bright colour and a really good coverage.

THE COLOURS:

Stockholm Chic: Copper bronze brown. The packaging makes you think it will be really shimmery as there is a gold shimmer on the outside but once one it has a gold/bronze reflect.


India Intrigue: Deep Pink looks more purple......Maybe a magenta colour would be more of a correct term


Parisian Passion: Purple/Burgundy kind of colour, Pretty dark vampy kind of colour


Barcelona Nights: Hot pink colour


Shanghai Sizzle: Bright Orange/red


Cannes Crush: Pretty bright coral colour


London Posh: Peachy nude with a gold shimmer tone


LA Exclusive: Light Pink


Rio Rush: Barbie Pink. Bright hot pink


Miami Fever: Bright Orange


 I love a lipstick to feel soft and moisturising and to be food proof. Which is why I love the Colorburst crayons but these are living up to their name. Once on they feel soft and moisturising. They feel more like a thick balm than a lipstick with a wet glossy finish and don't sticky. To get the best colour application apply two coats and press the product onto lips firmly with the doe-foot applicator. Its a great size and shape and the wider area lets me apply the lip colour to the wider areas of my lips easier and the tip is perfect for working around my cupids bow and corner.

At work I get lazy with reapplying lipstick I like to apply a lipstick in the morning before work, reapply at lunch and then again after work if I am going somewhere for drinks. And I can do this with these stains. I apply 2 coats before work, have a coffee, eat, drink water and talk to customers and by 10am the shine has worn off but I am still left with a nice stain one my lips.


My lips are still coloured and by lunch time its has worn off slightly but I always like to reapply my lipstick after lunch so I look fresh. Working in a shop with air conditioning my lips are always prone to drying cracking but they contain vitamin E and aloe to help keep the lips moist.

I have so many lipstick. To be honest I think my collection would be almost around 100. But I don't wear most of them some are drying and others wear off. My Colorburst crayons are my holy grail lip colours but I can see these becoming another favourite.

Revlon continue to be my favourite "drugstore" brand for lipsticks 


Until next time
xox

PS to keep up to date with products I'm loving, wearing or different makeup looks

 you can find me on Instagram: @claudaciousmakeup
Facebook: www.facebook.com/claudaciousmake

Sunday, 21 September 2014

Bondi Sands Self Tanning Foam Review

Summer is fast approaching and I can't wait. Sun, beaches, summer, clothes, and warmer weather. But for people like me who are so pale that when we are out in the sun we burn and go bright red and peel. Summer can be a nightmare. I wear sunscreen whenever I am outside to protect my skin from sun damage.

 I use to envy the girls with the golden tan.......Until a friend introduced me to Bondi Sands fake tan.


So I have now been using Bondi Sands Light/Medium Self Tanning Foam for over a year now and I haven't looked back.

The Bondi Sands foam is great for people like me (Non tan experts) Easy to apply, colour is amazing and smells so good.

This tan is blue/green based so there will never be an issue with an orange oompa loompa look about you  Even when the tan is developing I can go out and not feel like everyone is looking at me and knows that I have "just" faked tan. I also love the fact that I can apply 2 light coats of the tan sit in my dressing gown apply my makeup and then get dressed for work and the tan is dry (just avoid light coloured clothes while the tan is developing) A big bonus is the smell. It has a really nice scent of coconuts, my boyfriend has told me the smell reminds him of his Nan's biscuits.


PREP THE SKIN

I shave my legs the day before and exfoliate
It's important to remove any dead skin before applying fake tan so it doesn't look patchy and looks even and flawless. Just avoid an oil based exfoilater as the oil can create a layer between the tan and your skin making it harder for the tan to grab.

APPLYING THE TAN

I apply two pumps of the foam onto my tanning glove and then using circular motions I blend onto my skin. I normally like to start with my legs and work upwards. I only choose my legs first so they dry quicker so I can then sit down sooner after I apply it.
Apply a light coat all over legs, leave the knees to last and use whatever is left on the glove to rub over the knees. The knees, elbows ankles, feet and hands are the driest areas of the body and will soak up more tan which will make them darker
I wait an few minutes until the first layer is almost dry and apply another coat.


LETTING IT DRY

I find the foam dries quiet quickly I wait at least half an hour before applying clothes but I wear a dressing gown around the house while it dries.
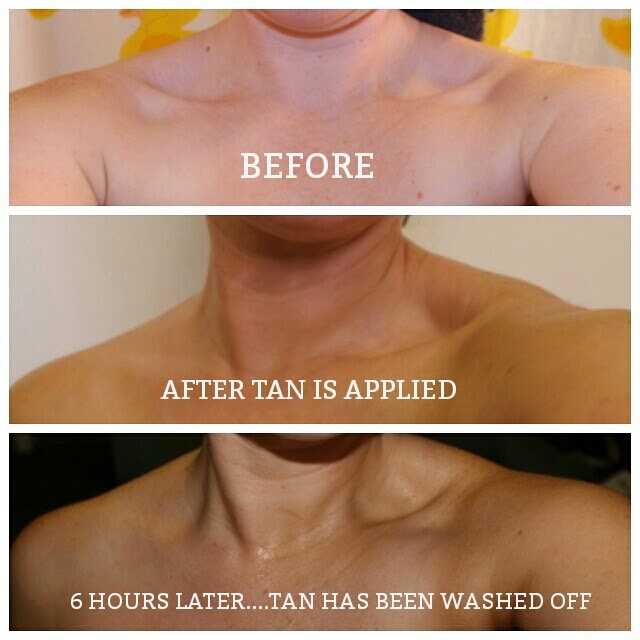
 Best thing about this product is that the colour is instant and for a light natural tan it can be washed off after an hour or left for up to 6 for a darker longer lasting tan.


AFTER 6 HOURS

So I normally like to apply this first thing after my shower in the morning and then wash it off at the end of the day. Or I apply it at night and wash it off the next morning. I wash it off and use a body wash to remove any excess. When I get out of the shower I pat myself dry and then apply a hydrating moisturiser all over my body.
I make sure I moisturise morning and night while I have fake tan on ( I use St Ives 24 Hour Deep Restoring with Almond Oil)


HOW IT WEARS

Bondi Sands Foam for me wears really well. It can look a little patchy in some areas after about 4-5 days but mostly in areas like my cleavage or under my arms, so not obvious areas like my arms stomach and legs. It fades evenly and then I soak in baby oil and exfoliate the rest off.


BEST BITS

This is Australian made
Comes in a 200ml Pump bottle
Very affordable at $19.99 at Priceline (but they do have it on special a lot)

Until next time
xox

PS to keep up to date with products I'm loving, wearing or different makeup looks

 you can find me on Instagram: @claudaciousmakeup
Facebook: www.facebook.com/claudaciousmakeup

Sunday, 14 September 2014

Chi Chi Fabulous and Flawless Foundation

If you follow me on Instagram you would have seen countless photos of me wearing/using Chi Chi's Fabulous and Flawless Foundation quite a few times a week. I have featured this foundation in other posts "Picking the right foundation for you" and in "July favourites"

But I felt like it deserved its very own post so I could go further into detail for you.

I have been using this foundation since July, not every day but I think at least every second day and I have finished my first bottle. Which I haven't done in such a long time, so I am a little excited about it

I was attracted to this foundation by the description on the packaging:

Flawless Face:
Oil free, ultra lightweight formula
Medium, yet buildable coverage
Long wearing, smudge proof, staying power
Easy glide on application
Skin looks and feels soft, fresh and natural
colour true, even looking shades.

Fabulous Formula:
Super moisturising
Super Hydrating
Antioxidant Vitamin enriched (A E and B5)
With continual use helps reduce the appearance of fine lines
Paraben free

After reading all this I had to try it and I loved it. I think it would be my favourite foundation to date. I have never found a foundation that does what it says it will do. I love the coverage as I can cover my freckles and when I tell people I have freckles they don't believe me, because my foundation looks so natural and flawless and doesn't go cakey as I build on the coverage and once it's on my face it stays there all day. It doesn't rub onto my clothes or my hands if I touch my face.

From the outset everything appealed to me. The packaging is simple but very eye appealing and with easy explanations of colour descriptions it makes it easy to select a shade. The bottle itself is lovely and looks like its worth more than its retail price of $29.95. It is a matte glass bottle with a pump which makes it easy to use. You can also unscrew the pump so you scrape every last little bit out (which I have been doing, so I don't waste it)


The formula is very easy to blend. It's not runny or thick, it's a nice consistency and doesn't feel heavy on at all and has a satin sort of finish. It's not matte but not dewy. It has a nice fragrant smell of flowers as well when you first pump it out of the bottle but once its applied and set with a powder I never smell it.


I have an oily T zone and struggle to find a foundation that stays on all day, especially on my nose and chin. I find myself having to touch up my makeup during the day with other brands, but Chi Chi Fabulous and Flawless I can wear this for at least 8 hours and it will still look ok when I get home from work, by then though I am a little shiny on my nose but for at least a solid 6 hours my freckles are covered and I look matte down the centre of my face. It also doesn't smudge off if you wipe it against clothes or touch your hand against your face.


I own two shades of this now. One for my normal skin tone and one for when I fake tan.


As you can see I am a fan and love this foundation and will recommend it to others, but I am aware everybody is different and different products suit everyone but for me this is amazing and I LOVE it and for the price I think it such great value. It is available from Myer and Target in Australia who have discounts on Chi Chi quite often.

Until next time
xox

PS to keep up to date with products I'm loving, wearing or different makeup looks

 you can find me on Instagram: @claudaciousmakeup
Facebook: www.facebook.com/claudaciousmakeup

Wednesday, 3 September 2014

How to Contour


Contouring can be tricky. knowing what products to use, how and where to use them. Contouring use to be for runway models, celebrities and fashion photo shoots, but these days contouring is used in many peoples daily makeup routine. So for those who are still confused about contouring let me explain briefly.

 Contouring is about creating shape to the face and enhancing your facial features. So by using a dark shade it will recede areas and make them look smaller (nose, forehead, double chin) and by using lighter shades it enhances them (cheekbones, centre of nose, under the eye) The whole reason makeup artists contour their clients is to achieve the "perfect" oval face.

Here is my guide to contouring

I start with a fresh cleansed face. Apply primer all over and then my chosen foundation.
The highlighting and contouring part is different for everyone there is no correct product to use. All I can suggest is use a product a few shades lighter for highlighting and a product a few shades darker for contouring.


I personally like to use Maybelline Fit Me concealers. They are easy to use and the colours are great for me.

I start with applying light concealer (I use shade 15 Fair) and I apply this under my eyes, on my cheekbones, down the centre of my nose, on my cupids bow and on the centre of my forehead and chin and blend.


Next I apply the darker concealer (30 Cafe) to the hollows of my cheeks, the sides of my chin, temples and my hairline and the side of my nose. Blend


For some people this is enough but I like to do more.

I apply Physicians Formula Mineral Glow Pearls in Translucent pearl over my cheekbones and under my eyes.


Then I apply Revlon Matte Bronzer 035 Sun on the hollows of my cheeks. By doing this it adds shimmer to my cheekbones and highlights them more, especially when the light hits my face. The reason I like using a matte bronzer is because I am wanting my contouring to look natural.


Following the bronzer I then set my foundation and contouring with Face of Australia translucent loose powder and lightly dust my whole face with it. For my end look I kept it simple and went for a bronzed eye and bold lip as I wanted my base to be the focus.

Same makeup but lighting was different... sorry

hope you found this helpful. 

Until 

Sunday, 10 August 2014

Younique 3D Fiber Lash Mascara

Hi everyone...... I have recently received the Younique mascara to try and wanted to share my thoughts about it with you, but before I do I feel like I need to have a little rant and get it out of the way

If you are familiar with social media especially Instagram and either have or follow a few beauty/makeup pages I am sure you would have come across this brand. I have seen lots of photos of people trying the mascara and was really impressed and wanted to try it. But I have come across some rude and pushy representatives for this brand which made me avoid even trying to contact someone about it. I personally don't like them spamming my photos trying to sell the product. A few have been pushy (maybe not intentionally) and I think its unprofessional. I understand that these people are trying to run a business and make money but there are other ways. I was contacted by a few representatives via email who were lovely and professional.
(Younique is a similar concept to Avon - seller earns commission/income from selling products)


Like I said I had really want to try this product, all the photos I had seen looked great and made a massive difference, but every photo I had seen was from someone that had connections with the brand. So here is my review of the mascara with no strings attached.


First Impression: Packaging was stunning from the actual parcel itself and then inside with the tissue paper. Unwrapping the tissue I found a black case, inside were two matte black tubes. Moodstruck transplant gel and Moodstuck natural fibers.


To apply: Concentrate on one eye at a time. Start with applying the transplant gel (mascara) onto your lashes like a normal mascara. Then coat the tips of your lashes with the fibers. I applied 2 layers of both and was happy with the look, I could have gone another layer but was worried my lashes would start to look spidery.


....... well it's been over a week and I have worn the mascara everyday and it's worn really well. It hasn't smudged or flaked and they look so long all day. Removes really easy at the end of the day with makeup remover. I use Bioderma Crealine H20 solution micellaire cleanser. It has taken me a little longer to do my mascara in the morning, so I would prefer to do wear this on weekends, when I had more time to get ready or for special occasions where false lashes would be a bit too much.

As you can see from below I have shown you before mascara
One eye with the mascara and one without
And then both eyes completed


After everything I think it's a really good mascara. My lashes do look amazing and long without looking spidery. I am just disappointed that the representatives are tarnishing the brand and spamming makeup/beauty accounts on social media and turning people off the brand before they even try the product.
Having said that I have gone through Jenn Sherrer via email and she has been so professional and helpful and polite. If you do wanna get your hands on this mascara and try it yourself contact her

www.youniqueproducts.com/JennSherrer/party
jennsherrer.yp@gmail.com

Take care
Until next time xox

Sunday, 22 June 2014

Chi Chi New Smokey Eye Palette


So it was my birthday during the week and I got the new Chi Chi Smokeys palette. I have used it quiet a few times already so I thought I would share the looks I did with you all, how to recreate them and my impressions on the palette.


When I first saw this palette I wasn't sure how much I would use these colours and if they would suit me (I tend to wear more golds, bronze and browns)


I have played around with three different smokey eye looks and was really surprised with how pretty they looked. Like all the Chi Chi palettes the colours are highly pigmented, they are creamy so there is no fall out. I love that the palette contains matte and shimmery colours


LOOK 1: BLUE SMOKEY EYE


1. Apply the blue shade into the crease and blend onto the eyelid.
2. Build up the blue by applying more of the colour over the top in the crease. And blend.
3. Add the matte black to the outer corner and into the crease. Blending the colour out. 
4. Lightly place some of the black shimmer onto the eyelid and blend over the area (except for the inner corner)
5. On the inner corner and on the brow bone place the silver shade to use as a highlighter against the darker colours.
6. Apply a little blue and black on the bottom lashline and blend lightly.
7.  Line the top lash line with liquid eyeliner.
8. Coat top and bottom lashes with mascara and then add some fake lashes.


LOOK 2: PLUM BROWN EYE


1. Start with applying the plum shade I to the creaseof the eye and then blend. Repeat until you have a nice deep colour and blend any harsh lines.
2. Add the matte brown shade on the outer corner in a C shape, into the crease and on the eyelid. Blend all over.
3. Apply some of the light gold colour into the inner corner of the eye.
4. Line bottom lash line with the matte brown eyeshdow and lighlty blend 
5. Apply liquid eyeliner along top lashline
6. Coat lashes with mascara and finish with a full bar of false lashes 


LOOK 3: SOFT BROWN EYE LOOK


1. Apply the soft light brown all over the eyelid and blend into crease. 
2. On the outer corner apply the matte shade and build up the colour. Blend into crease.
3. Using liquid eyeliner apply it along the top lashline and use a black eye pencil and lightly apply on bottom lash line
4. Coat lashes with mascara. 


Hope you all liked these looks 
Until next time xoxo


Sunday, 8 June 2014

Winter makeup trends 2014

Well winter is finally here so I thought I would share with you the latest looks for winter inspired from the runaways across the globe

Biggest winter trends will be:

Metallic eyeshadows: lots of gold, bronze, copper, browns and chocolates

Smokey eye makeup

Deep wine and plum lipsticks

Blue eyemakeup

Cat eyeliner

Also I thought I would show these looks since MAC has released its deep purple lipstick 'Pure Heroine' from the limited edition MAC Lorde range this week just in time for winter


I hope you like these looks

Smokey eye and small winged eyeliner.....
I am wearing Loreal infallible eyeshadow in 'Endless Chocolate'
All over eye lid and blended up into the crease worn with gel eyeliner and flicked out at the corners
                   
 
Plum and wine lipsticks 
I am loving the colours from Rimmel and Loreal for this seasons colour of lipstick my 2 favourites are Loreals #374 Intense plum
and Rimmels #09
Some other great ones are #330 Sloane's Plum, #120 Cutting Edge,  #500 Diva Red, all by Rimmel


Blue eye makeup
Really happy with how this look turned out.
I applied the Models Prefer infinite coloured eyeliner in 'Blue Lagoon' along my lash line and flicked out on the corner. To intensify the look I applied Savvy liquid eyeliner in 'Starling' over the top. I then coated both my top and bottom lashes  with Australis mascara 'Electric Blue' and applied blue fake lashes.

Metallic eyeshadow
I wear this look alot I love dark brown eyemakeup and bronze and gold shimmers on top.
I used Chi Chi 'Bronzes' eyeshadow palette as my base. I used one of the darker shades in the middle of the palette and applied it into my crease until I had built up the colour. I then applied Napoleon loose eye dust 'Star Dust' in the inner corner of my eye and blended outwards. Next I used Loreal infallible eyeshadow 'Endless Chocolate' on the outer corner and blended into my crease then in the middle of my eyelid I used 'Copper Element' loose eye dust by Napoleon. Gel eyeliner along my lashline 2 coats of mascara and fake lashes to complete the look.


Wednesday, 4 June 2014

Basic eye makeup for everyday

I have 2 looks for basic eye makeup for everyday. Depending on time and where I am going.

Look a) Maybelline eye tattoo in "bad to the bronze". This is the best cream eyeshadow I have ever come across. Its Smudge proof, water resistant, doesn't crease and I love this colour for daily wear. Plus it makes my blue eyes pop.


To apply just dab onto eye lid and lightly blend into crease. Thats it eyeshadow is done.

Look b) I use 2 matte eyeshadows from Chi Chi "To the moon and back" and "Enough is enough"
Apply "To the moon and back" all over lid and blend up into crease. On the outer corner and into the crease apply "Enough is enough". Once blended it will look like a soft smokey eye on the outer corner and blended from darkest shade on the outer corner to the lightest on the inner corner.


On both looks I will use the Revlon liquid pen eyeliner (gel liner if I have more time) I like that its easy to use. I feel more comfortable using it and get a better finish. It dries quickly on my eyes and it lasts all day.
On my lower lash line I will wear a black pencil eyeliner


Next is mascara. My current favourite is Lash Mania by Essence. It makes my lashes look so good, I really wasn't expecting much from a $4.95 mascara (I shouldn't judge a book by its cover)  it is clump free and I have worn it and cried and it hasn't given me panda eyes yet its not waterproof.


Last but not least.......(well I do mine before my eye makeup)  most important step BROWS
Brows work wonder. I never use to do mine and cringe  when I see old photos. But these days I love dark defined brows. I use the Essence brow stylist kit. This is perfect for beginners it comes with stencils so you can get perfect brows.


And thats my basic eye look for everyday hope you have enjoyed

Until next time xox

Claudia